Today, our parent company Prusa Research has nearly 700 employees, several production lines, a seven-story building in Prague’s Holešovice district and more than a hundred thousand 3D printers all around the world. In 10 years of existence, we managed to significantly advance the possibilities of 3D printed plastics, which we now produce in a plethora of colours and variations from plain PLA to the highly advanced PC Blend Carbon Fiber. We are also more aware of our environmental impact than ever before.
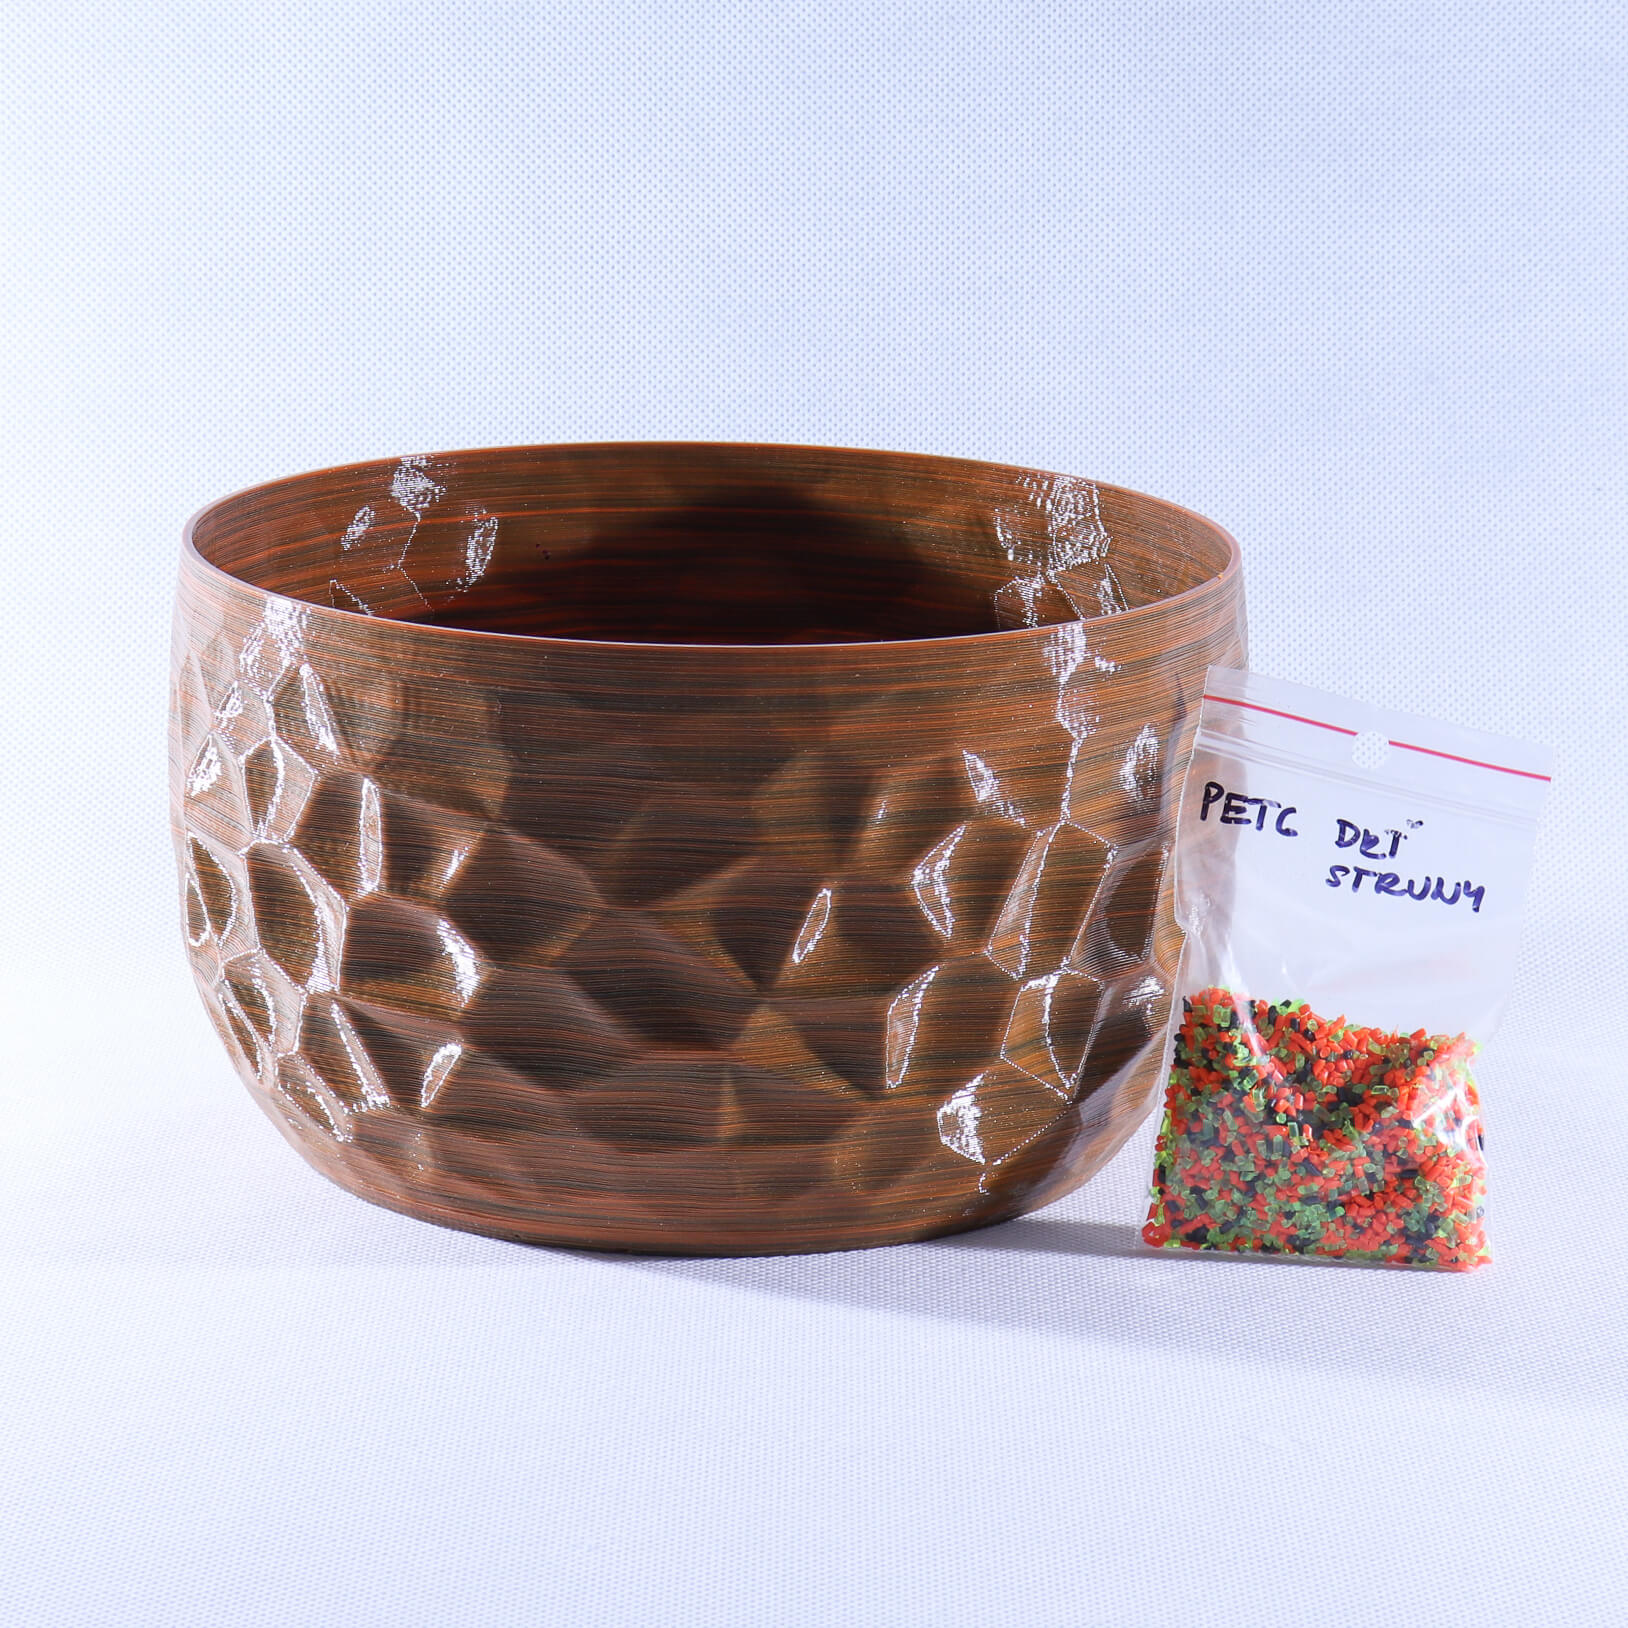
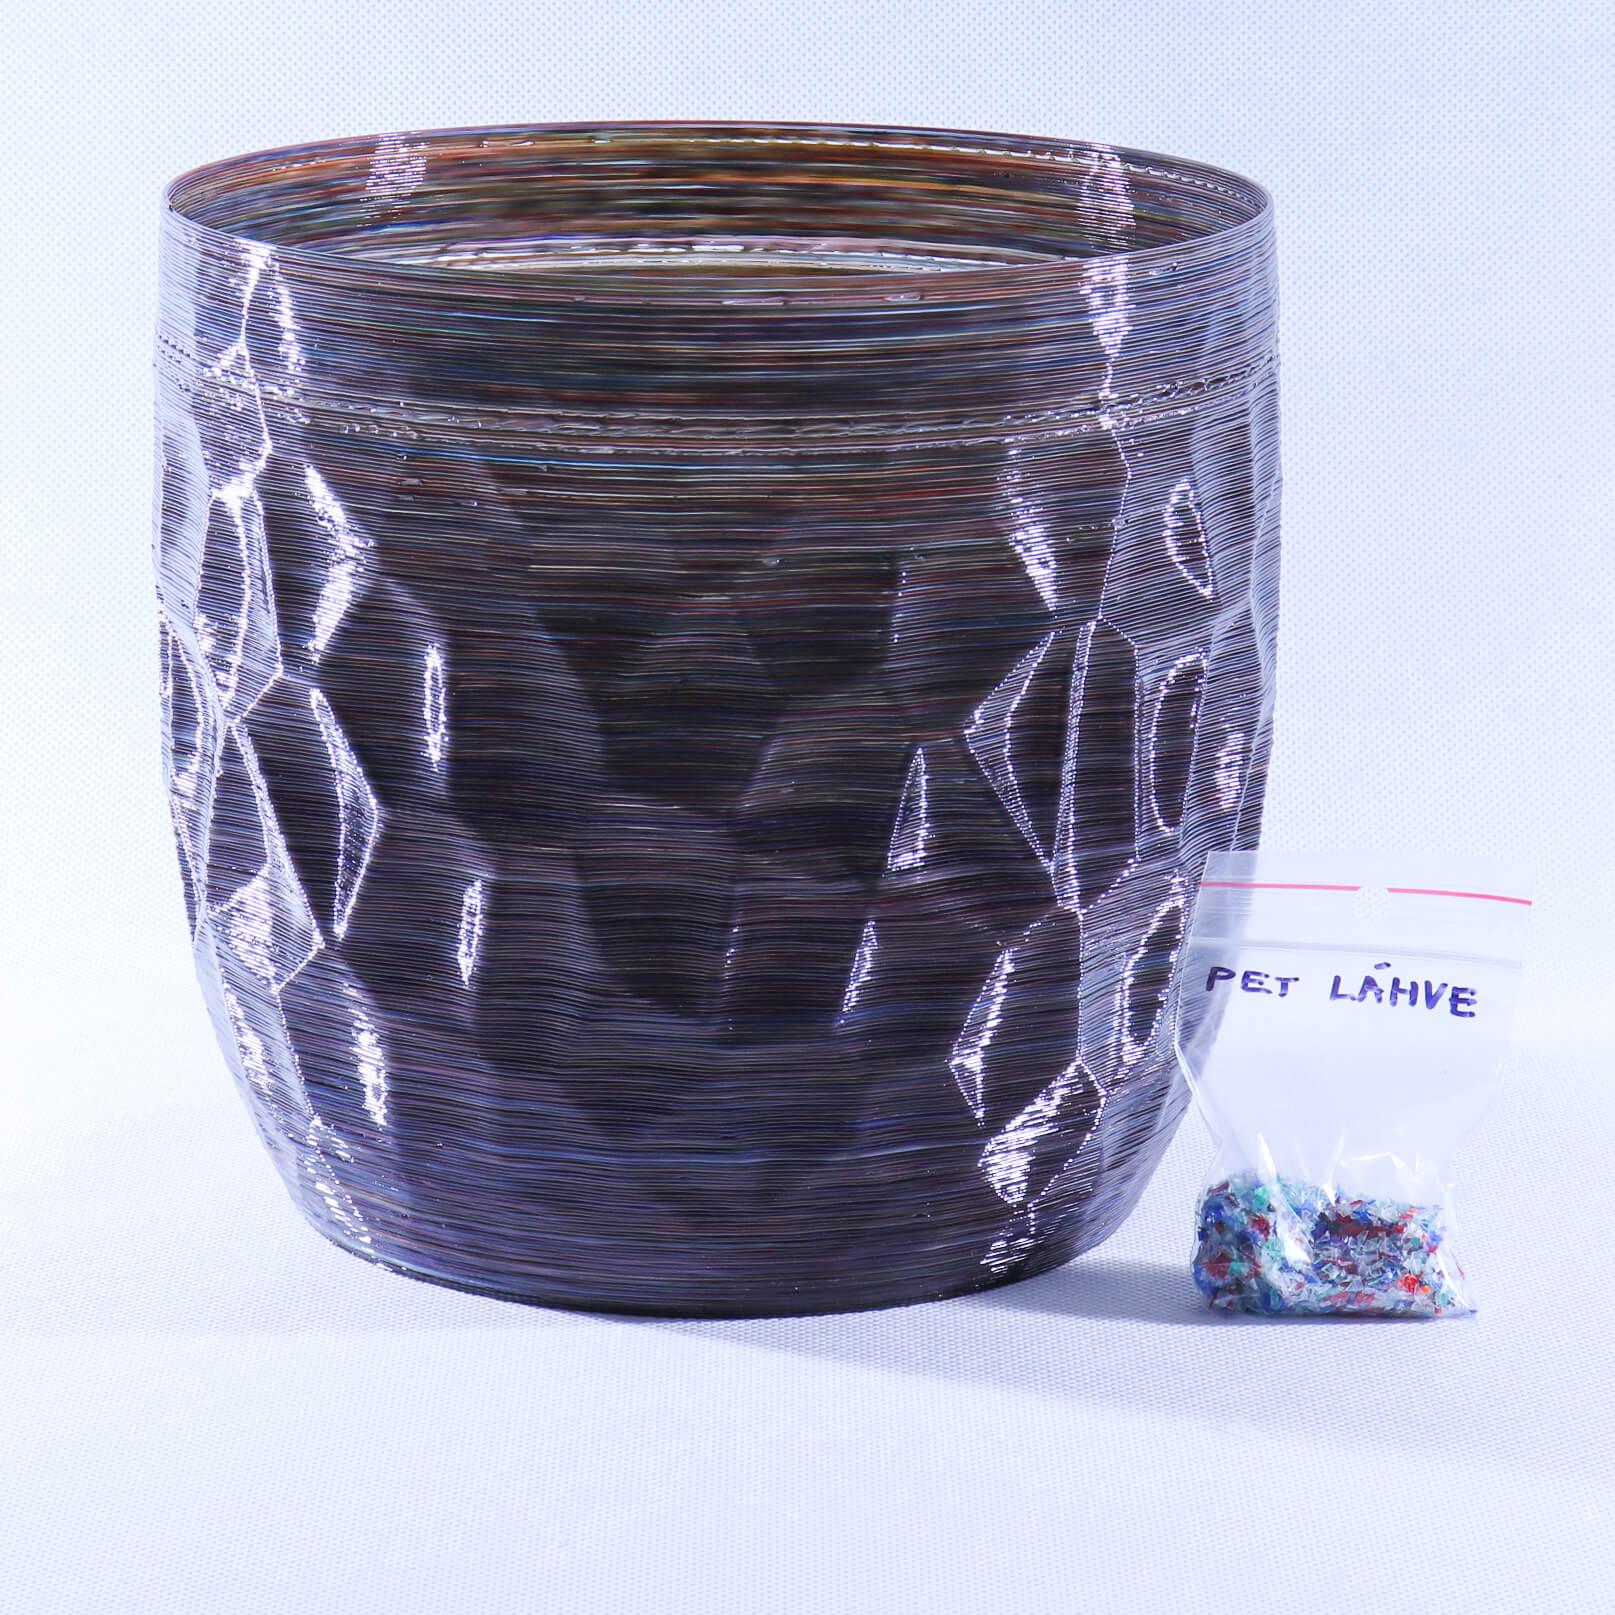
We strive to lead by example and motivate the community and other companies to behave responsibly. This is why we’ve created a dedicated sustainability department that focuses on reducing the company’s carbon footprint, extending the life of our products, and reducing waste. Concrete examples include the production of 100% recycled filament, a detailed supplier analysis, life cycle assessments of individual products, or establishing a community garden for our employees. Another example is a project that PrusaLab is heavily involved in, one which is also the subject of today’s article – large-format 3D printing of recycled pelletized plastics.
From drawing to 3D printing
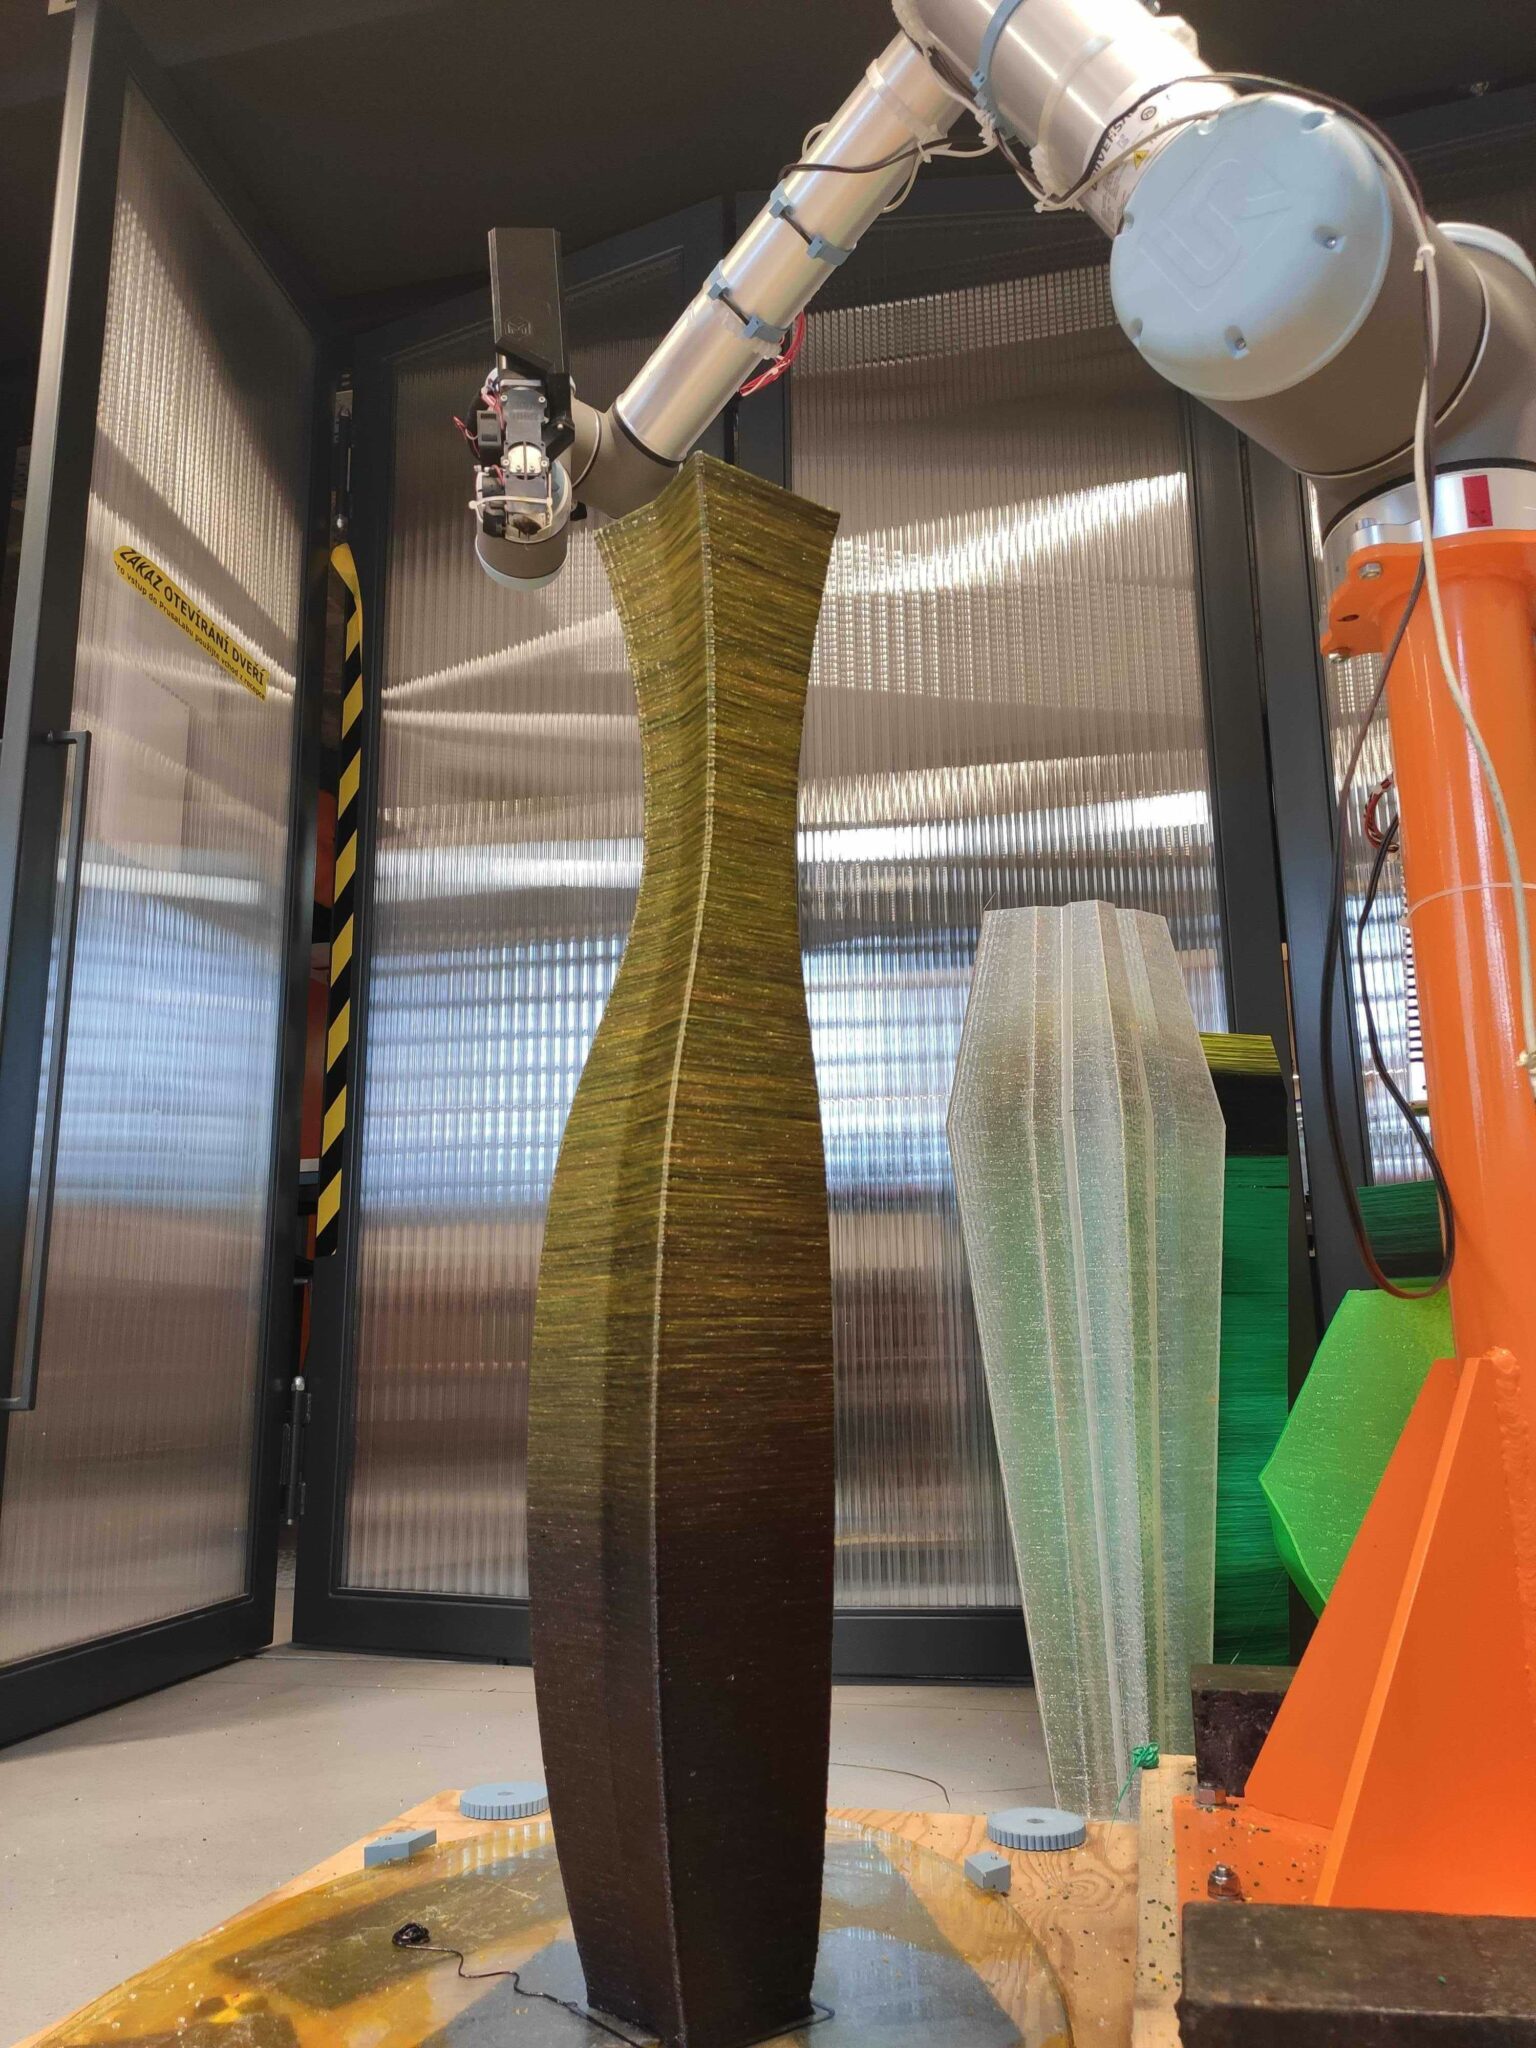
This project is an effort to recycle plastic waste generated by our company, specifically by the production of filaments, using a robotic arm and a pellet extruder. The project unofficially started when we received a damaged Universal Robots UR10 arm from another department upstairs where it was no longer needed. We repaired it and tried to teach the robot to draw on a blackboard together with our friend and resident architect Petr Vacek (check out the video – it has English subtitles!).
The experiment allowed us to learn about the basic functionality of a collaborative robot, which would later allow us to use it for 3D printing from so-called pelletized materials. We use Prusament material that did not pass our strict quality control and thus has no other use except for being remade into pellets (repelletized), small particles of plastic that resemble fine pebbles.
Starring: the pellet extruder
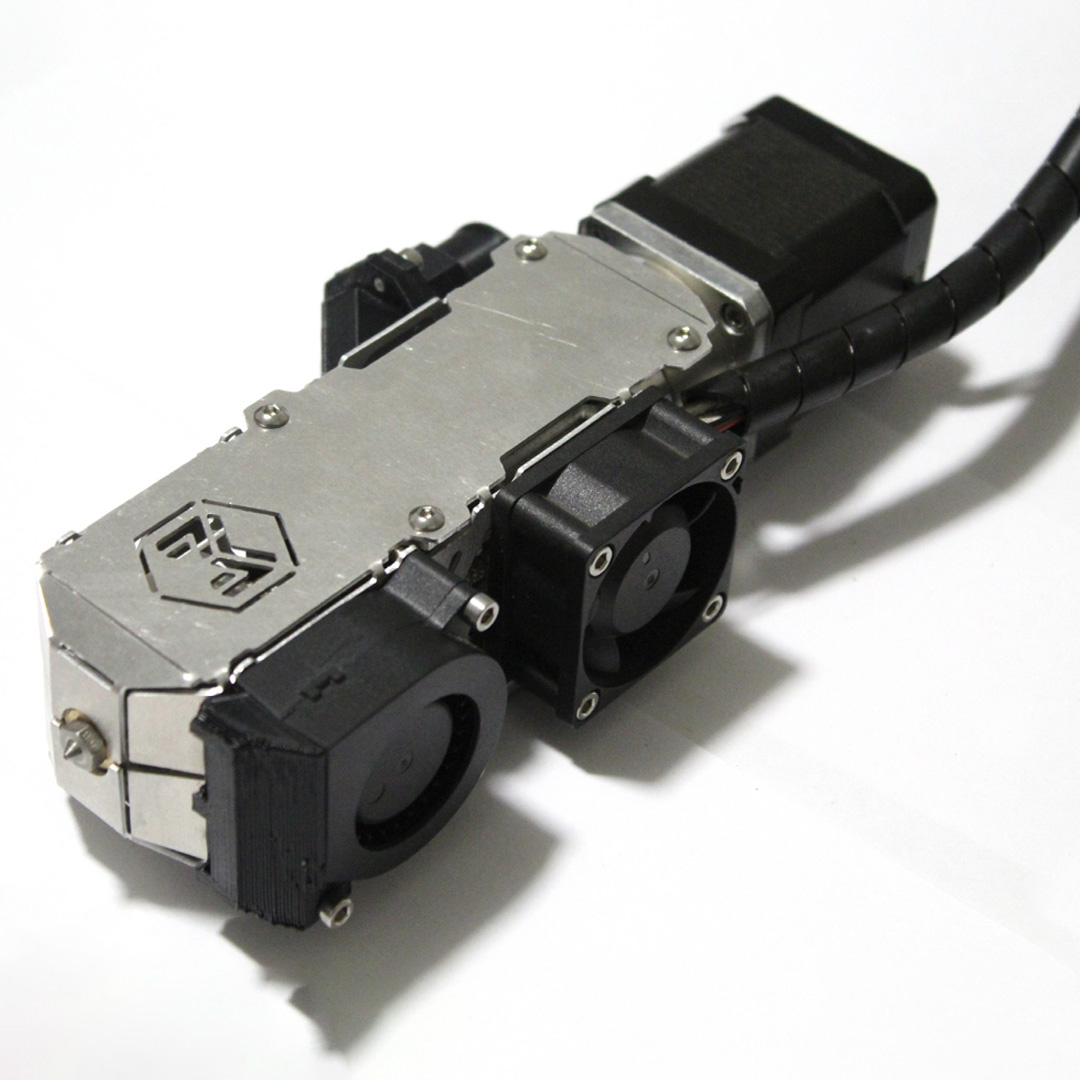
The last essential component in our large-format 3D printing journey is an extruder capable of processing large quantities of material. After a lengthy market research session, we decided to go with a Pellet Extruder v4 from the Spanish company Mahor, but we also considered alternatives from Dyze Design or the open-source RichRap extruder. The pellet extruder uses plastic pellets and a “snail screw” instead of the well-known drive gear and filament spool combination used on desktop 3D printers. You can think of the snail screw as a large drill bit that rotates around its own axis to pick up pellets from a hopper and push them lower into the heating area, where they melt and are eventually pushed out through the nozzle.
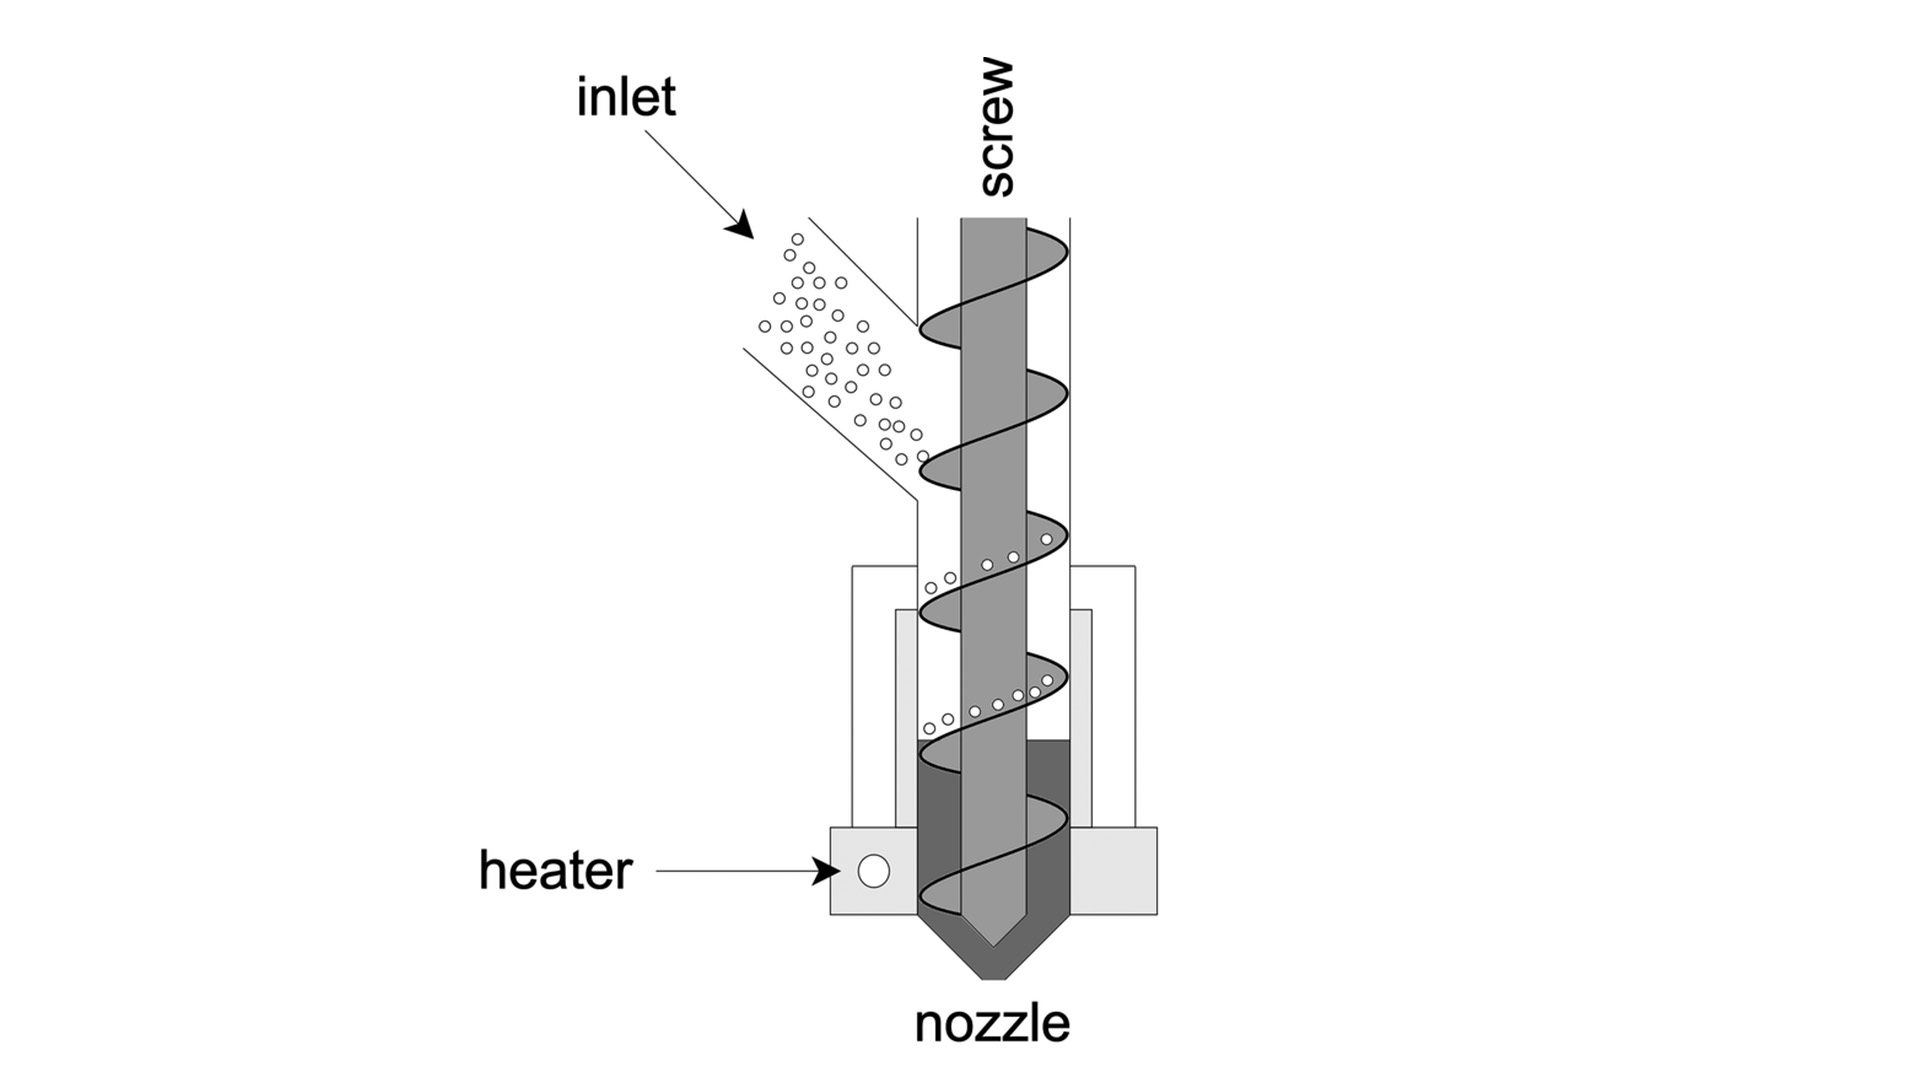
The main advantage of this solution is that a pellet extruder isn’t limited by a single 1.75 mm spool of filament, so it can process much more material than a traditional FDM 3D printer. The pellets can also be added in freely during the printing process, which allows us to blend different material properties or create beautiful gradients.
The disadvantage, on the other hand, lies in the higher temperature required to melt the pellets efficiently. For example, the printing temperature of PETG is about 30°C higher on the pellet extruder than on the MK3S+, which means that the print requires much more sophisticated cooling and is more likely to peel off from the print bed or experience surface warping. We try to minimize this problem by cooling the print with both an extruder fan and external cooling, which ensures an even temperature throughout the print.
The original configuration of the extruder managed to extrude around 220 grams of material per hour, but with modifications including a new motor, better cooling, better nozzles, and new heating elements, we managed to get to over half a kilogram per hour.

Slicing, but in a different way
Before printing anything, we needed to figure out how to make the robot behave like a 3D printer. Preparing print data for a six-axis robotic arm is obviously not the same as slicing for a three-axis cartesian 3D printer. Thankfully, Petr Vacek helped us out a lot by introducing us to Rhinoceros 3D and its Grasshopper plugin. Rhinoceros 3D (Rhino for short) is a freeform CAD program used by architects and industrial designers. Unlike Fusion 360 or Inventor, it gives the user more control over the modelling process and the data behind it, for example by removing automatic constraints and other such features.
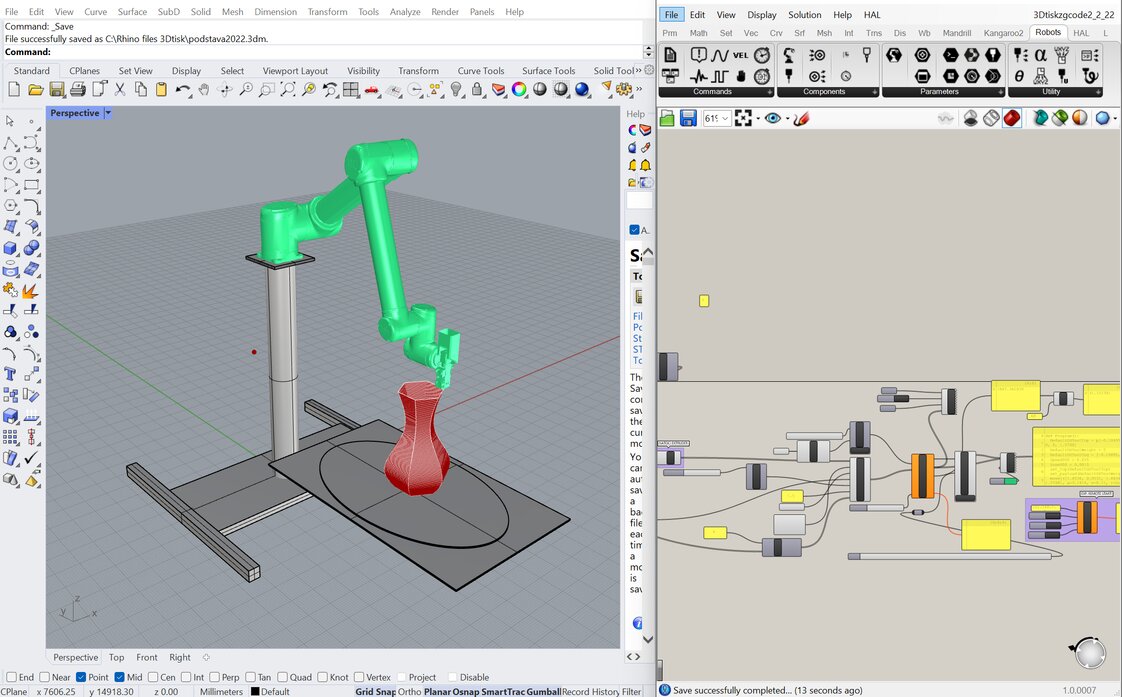
With greater control over the model comes the ability to modify the model’s parameters, a feature provided by the legendary Grasshopper plugin. Grasshopper is a visual environment that offers components representing blocks of code. Inputs and outputs of these components can be grouped together and connected on a canvas. This workflow is commonly referred to as parametric design.
At the beginning of our experiments with the robot, parametric design was a real challenge for us because we were still learning to think parametrically and to work with CAD data efficiently. Sources such as the Rhino Grasshopper YouTube channel provided us with a lot of practical knowledge, along with the books Advanced 3D Printing with Grasshopper and AAD Algorithms-Aided Design by the renowned architect Arturo Tedeschi. Based on these sources, we managed to convert commands from a .gcode file generated by PrusaSlicer to coordinates that Rhino can work with and understands. With Grasshopper and the Visose Robots plugin, we can then translate these coordinates into a URscript file that generates commands for each of the robot’s axes.
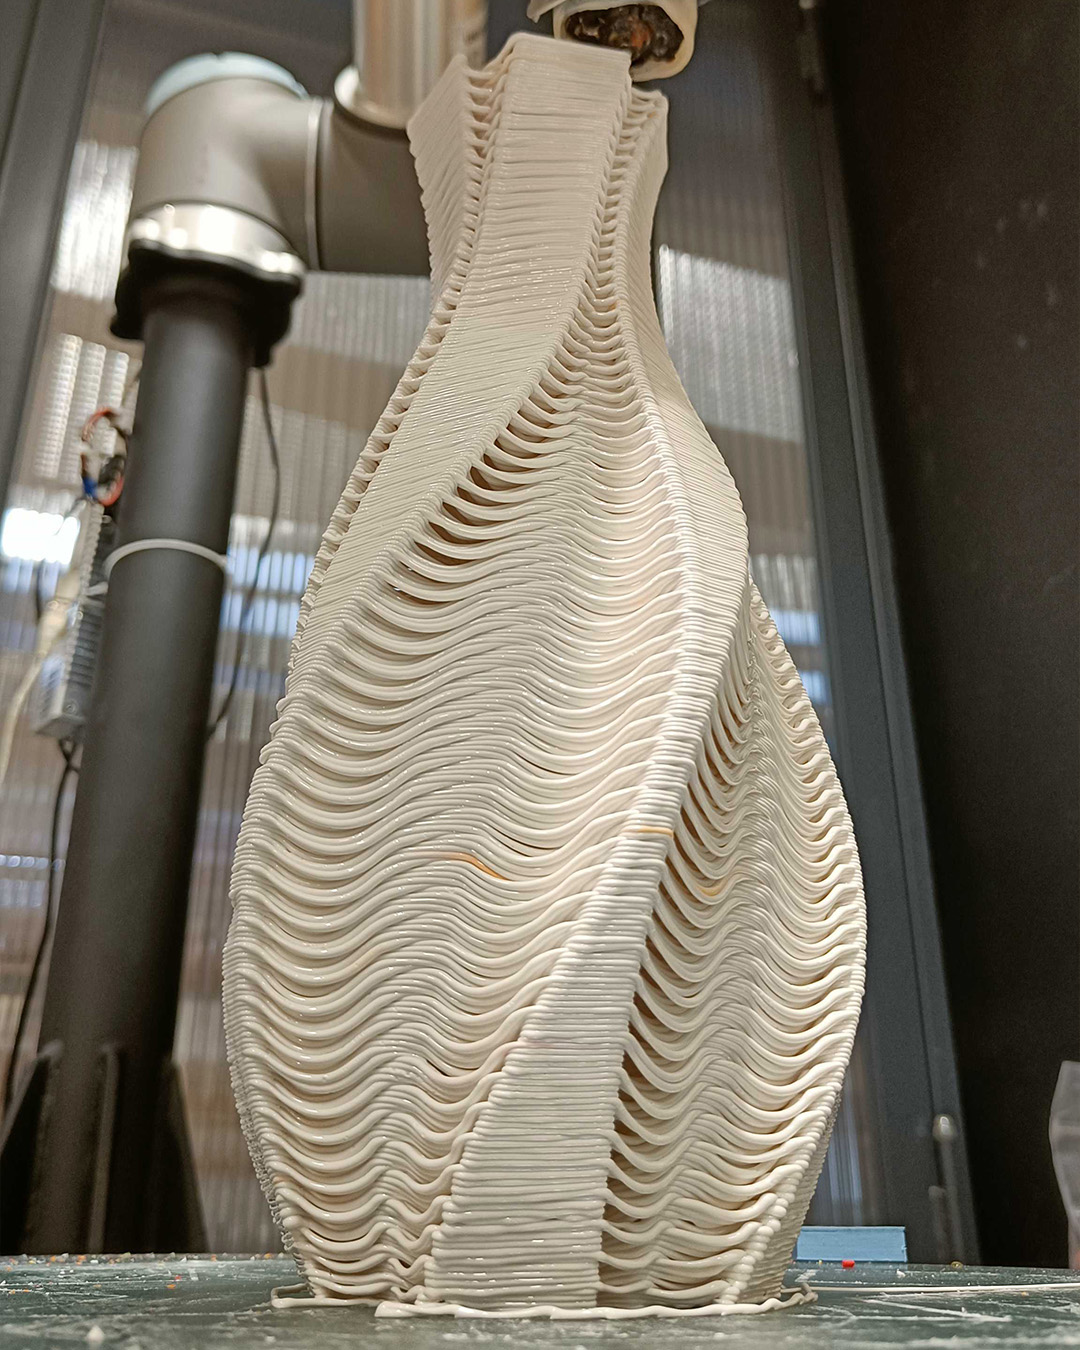
This step, i.e. the conversion of Rhino coordinates into instructions for the robot, also allowed us to later generate and slice objects directly in Rhino using Grasshopper. This meant that we could bypass the limits of traditional slicing and print experiments such as wavy surfaces that slicer wouldn’t allow due to “empty layers” or non-planar prints. The ability to print non-planar objects is the biggest advantage of the robotic arm over a traditional cartesian, delta or coreXY printer.
Temporary shortcomings and future plants
At the moment, we are working on controlling the extruder – the movement of the robot and the extruder are currently two independent systems, so features like retractions or elegantly stopping during printing are not yet possible. However, the UR10 arm has several digital and analog inputs and outputs that will allow us to send a signal to the extruder controller to stop or start extruding. We aim to generate these signals in Grasshopper together with the print data, so that they become part of the same program and the robot controller receives them in real-time along with axis position instructions.
The aforementioned Mahor extruder also needed an upgrade, as it has a 2 mm nozzle diameter, which may seem more than enough in the context of conventional desktop 3D printers that typically work with a 0.4mm nozzle, but from a large-format 3D printing perspective, it is a relatively small diameter. Moreover, nozzle size directly affects the maximum mass flow rate per unit of time, which is one of the key factors for printing large objects quickly and efficiently.
That is why we decided to develop a new high-volume extruder that is tailored to our needs in cooperation with 3Deposition. This extruder should be able to handle up to 5 kg of material per hour, which would allow us to move from printing vases or flower pots to printing chairs, sofas, and other pieces of furniture. We will keep you updated on the development of the extruder and any subsequent experiments.
